Kanyini Bear All Crochet No Sew Tutorial
Trauma Teddy or just a Teddy! pdf Crochet Kanyini Bear Tutorial
Support groups give Kanyini bears to children and adults to help in traumatic situations. “Kanyini” is an Australian indigenous word, encompassing the concept of caring for the environment and each other with unconditional love and responsibility. Its four principles are; Belief, Spirit, Land/Belonging.
I belong to a group that makes beanies, scarfs, blankets and teddies among other things, for various charities.
I developed this pattern for the teddy to minimise sewing body parts together. I’m really not a fan of sewing crochet together. All the body parts here are crocheted together as you go, and the sewing is limited to attaching the embellishments, embroidering the face, closing the head, and weaving in the final ends. Yay!
For an indigenous bear, use red for the legs, black for the body and arms, and whatever head colour you prefer. I use a grey/brown. There is a yellow crocheted circle on his tummy – sewn on separately.
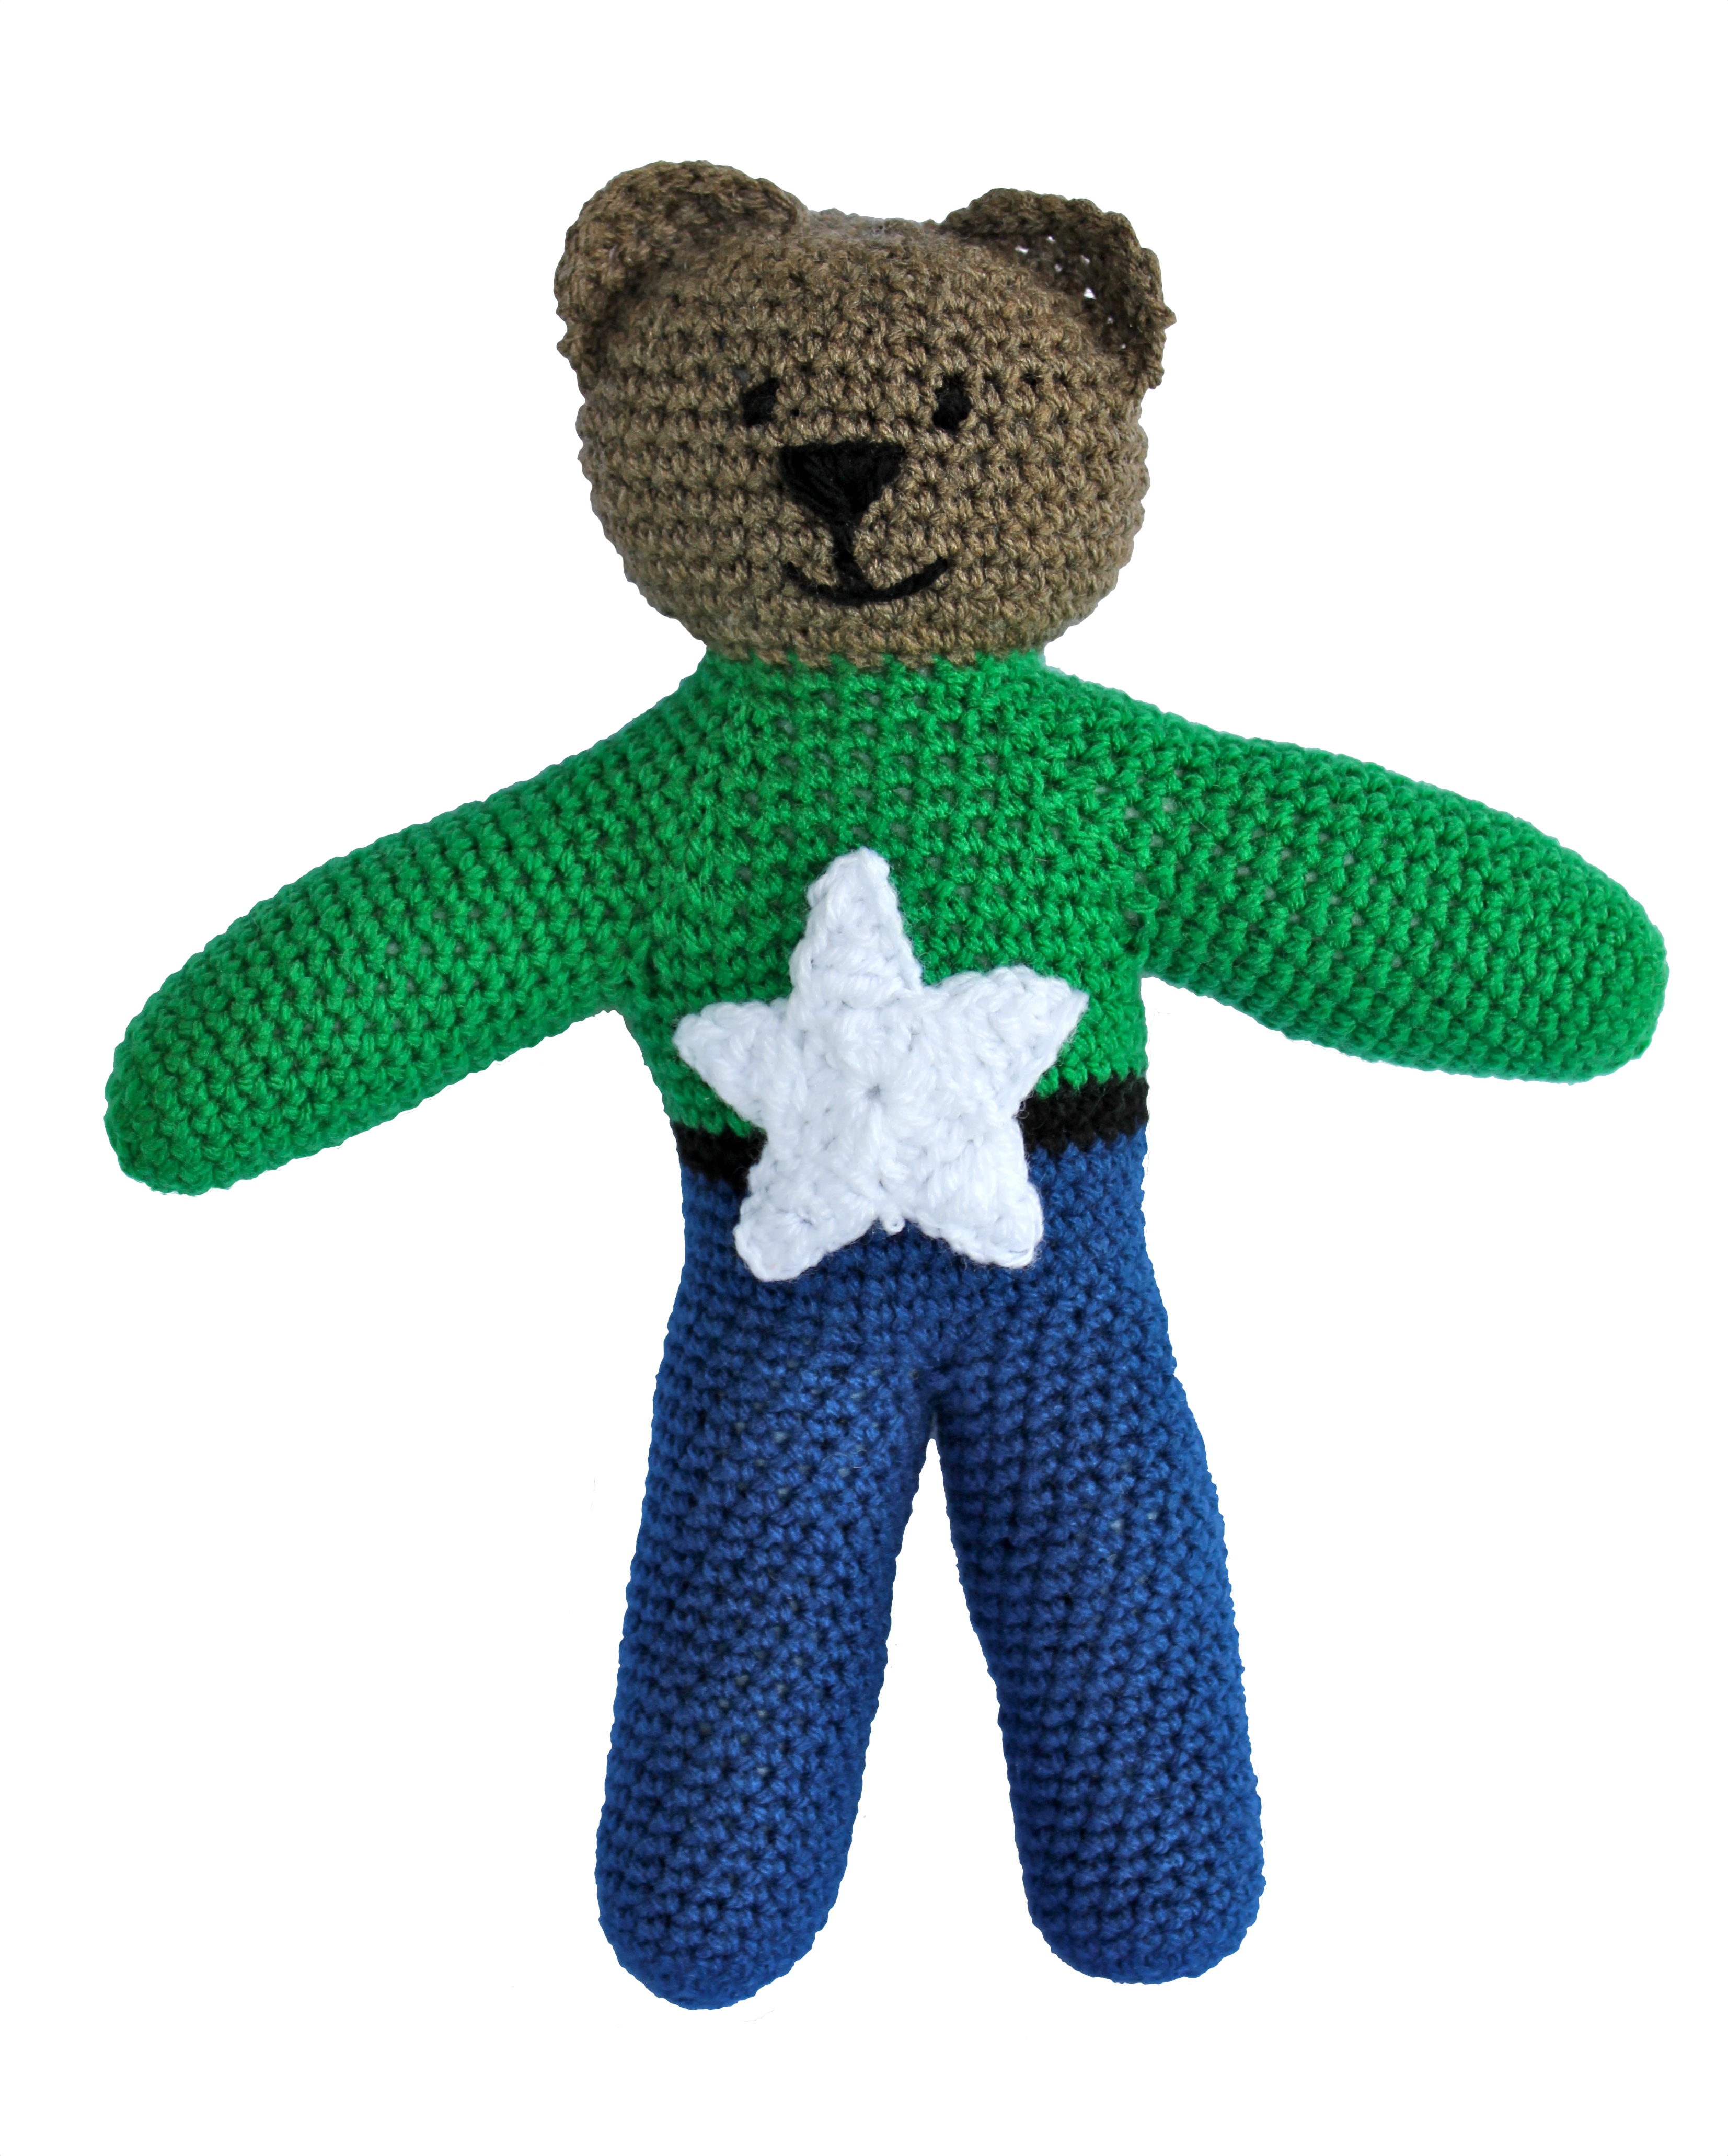
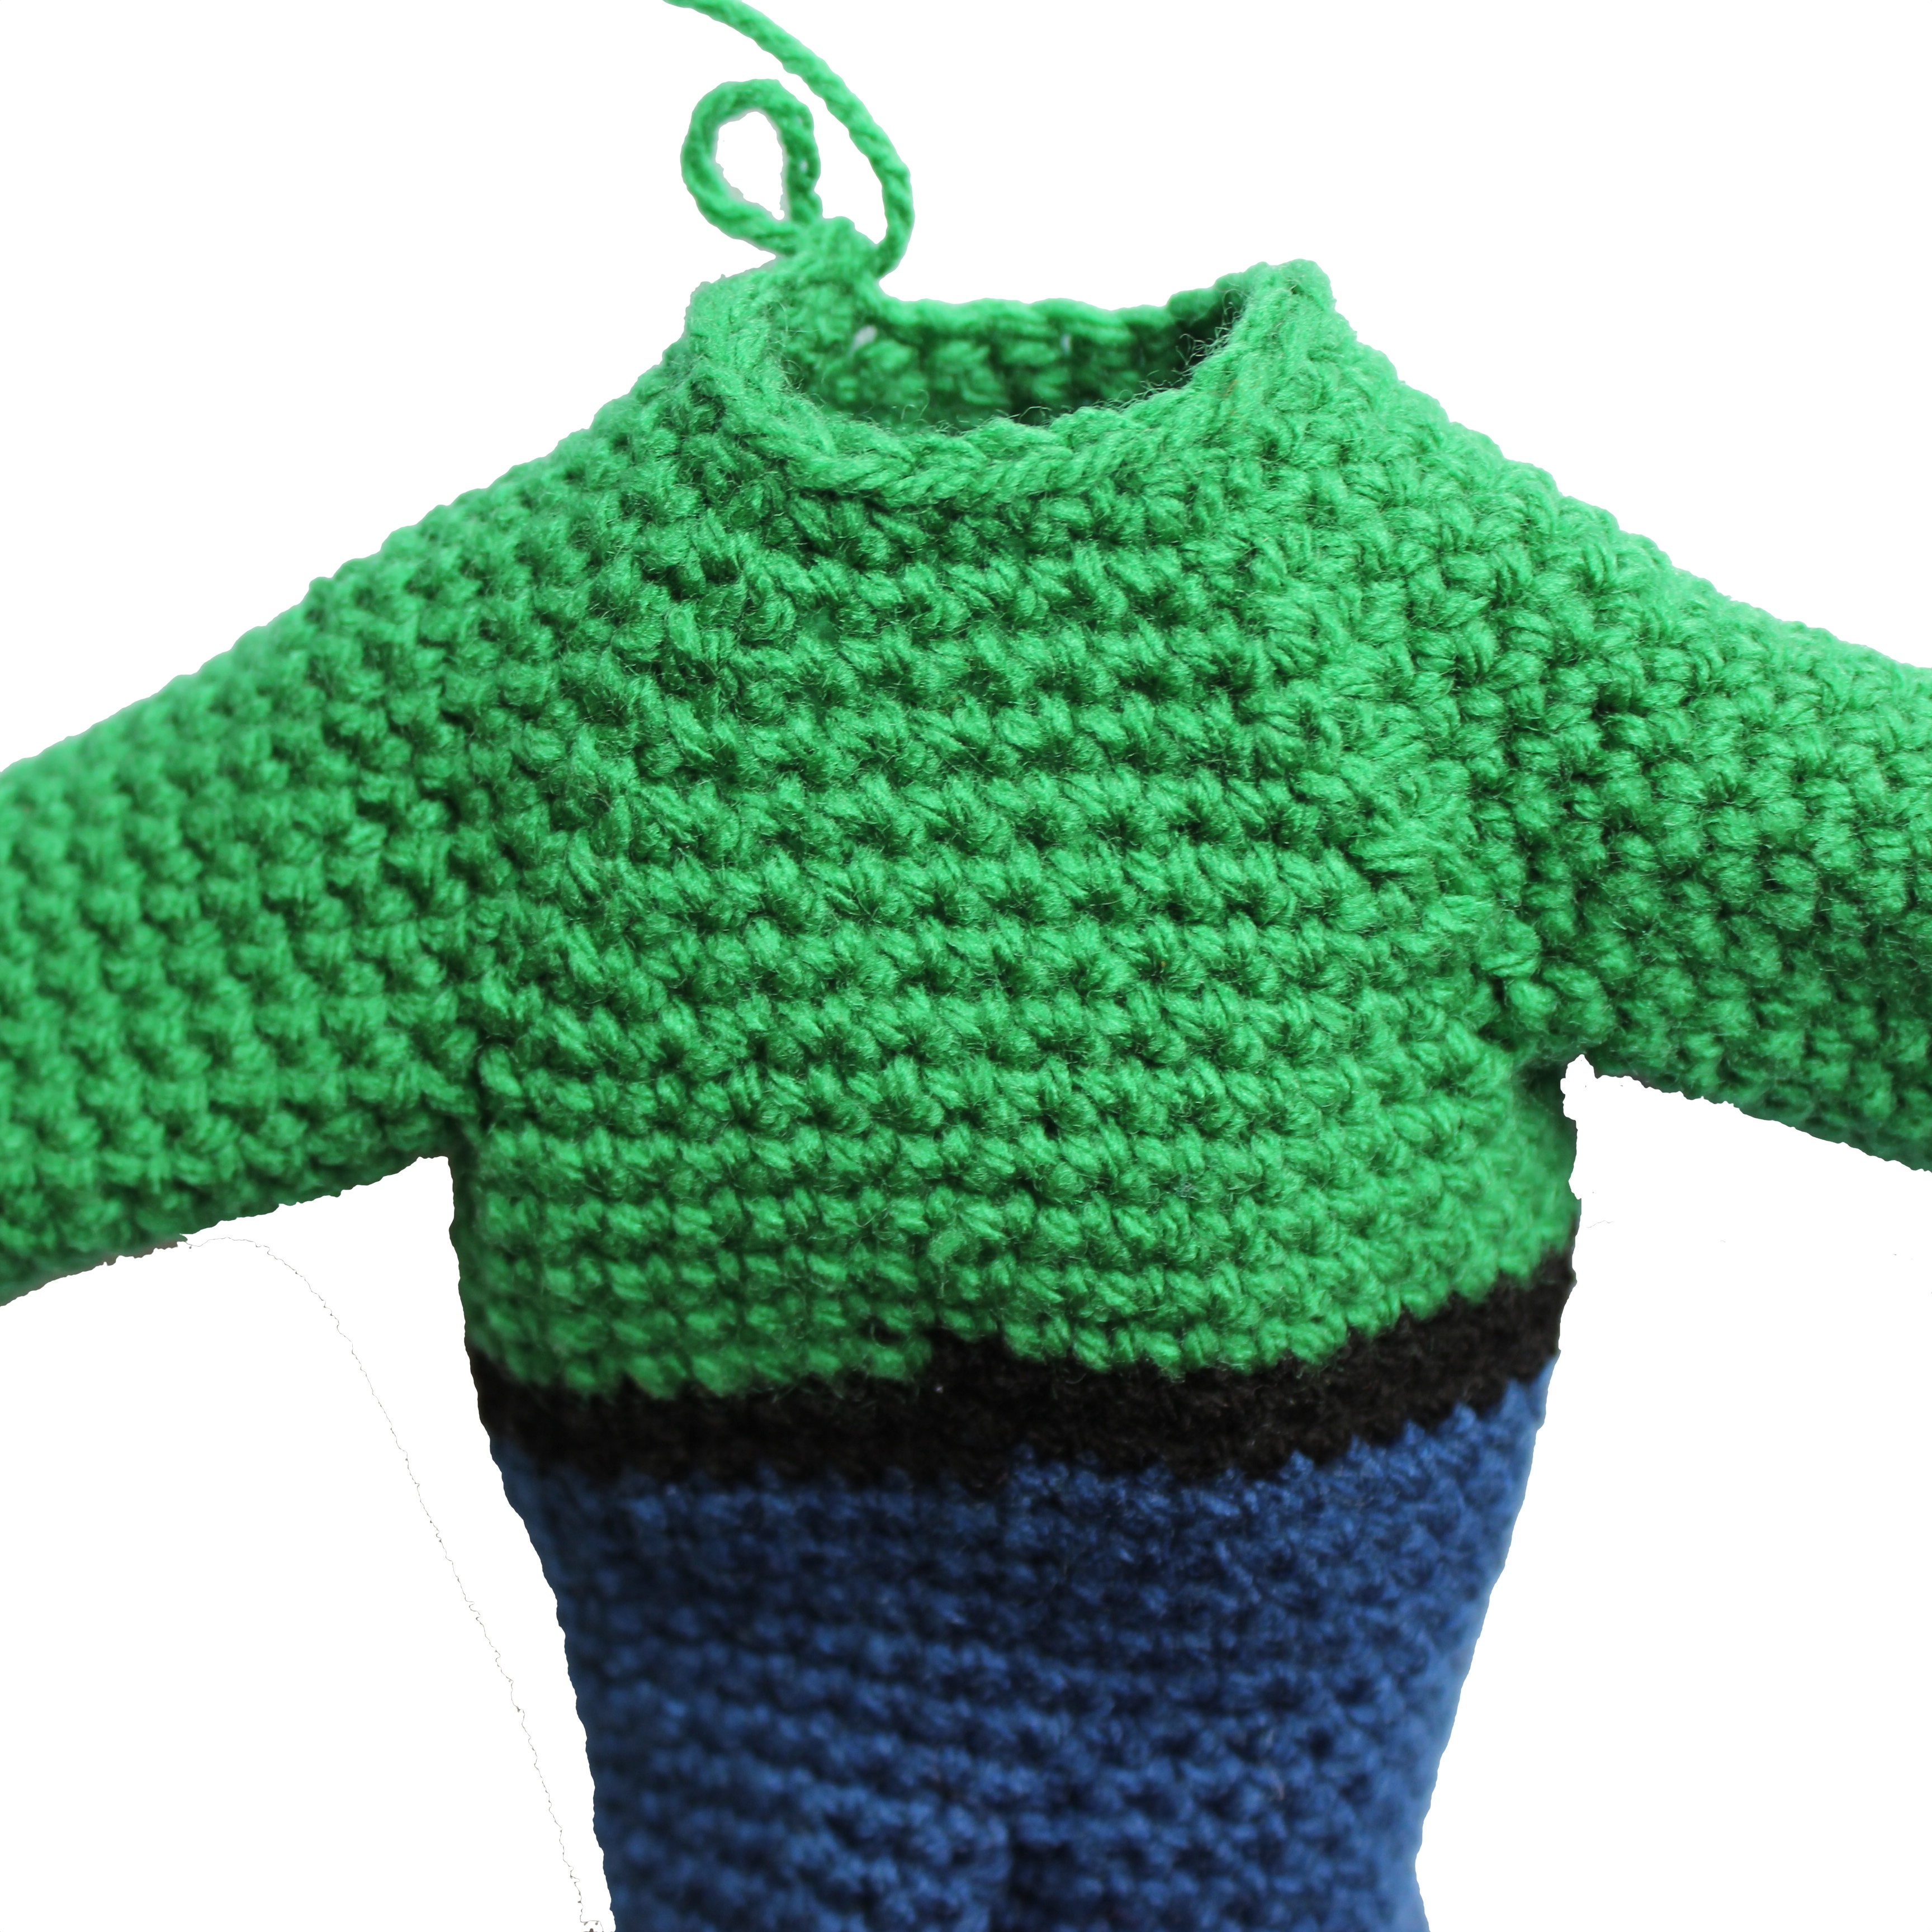
For a Torres Strait Islander bear, use blue for the legs, green for the body and arms, your prefered head colour, and a white star sewn on the tummy. These colours reference their flags.
Or you can use whatever bear colour you prefer!
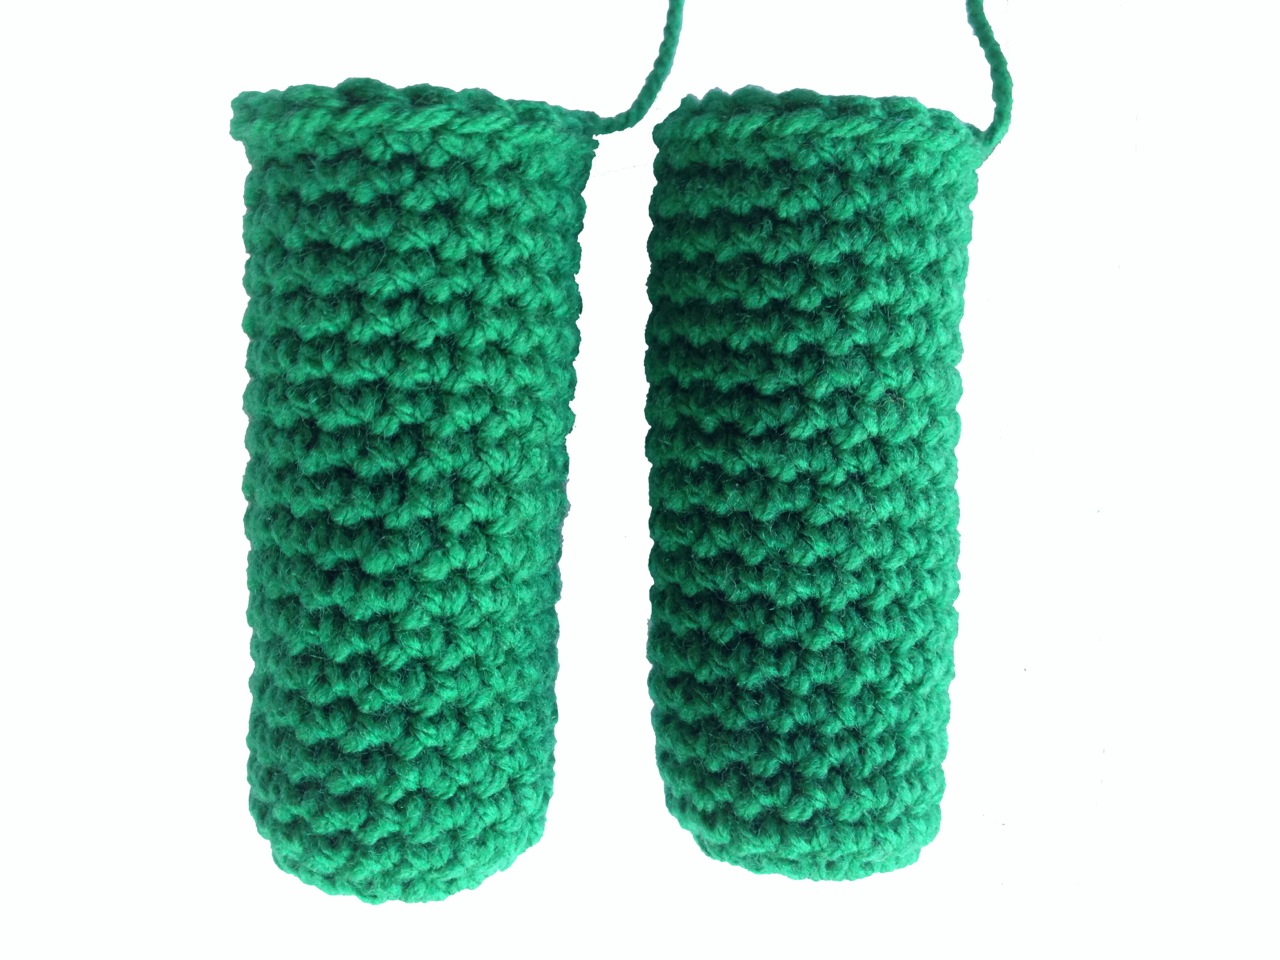
I use 8 ply acrylic yarn, with a 4mm hook. This keeps the weave tight so the stuffing doesn’t show. If you are a tight crocheter, then a larger hook might suit. The bear on the left is made with a 4mm hook, the one of the right with a 4.5mm hook. You can see the difference in weave size, and also the bear is a bit taller.
Notes: Magic circle instructions at end, or there is an excellent tutuorial here: http://www.allaboutami.com/post/6053699559/magiccircle
- sc – insert hook, yarn over, pull through (2 stitches on hook), yarn over, pull through both stitches.
- inc – 2 sc into the same stitch,
- sc2tog – (invisible decrease) insert hook in front loops only of next two stitches, yarn over, pull through both loops, yarn over, pull through 2 stitches.
- * * repeat instructions between stars as many times as indicated.
Start
Magic circle to start.
Round 1: Ch 1, 7 sc into magic circle, pull magic circle tight.
Round 2: 2 sc into each stitch (14 stitches)

Round 3: Sc into next stitch, 2 sc into following stitch, repeat 4 more times. (20 stitches)
Rounds 4 – 20: Sc into every stitch going round and round till you have a leg measuring about 10cm.

Finish leg off with a slip stitch, and set aside.
Make a second leg exactly the same, but don’t finish off. (It does not matter if your legs are slightly longer or shorter than 10cm, as long as they are both the same. We like all our bears to have their own personality!)
Joining the Legs
Hold the legs together and sc 4 stitches across the top of the legs.

After they are joined, we are going to continue crocheting around the outside of the legs in a big oval to make the body. Continue with Body Round 1.
Body
Note the beginning of the rounds are in the centre front of the bear.
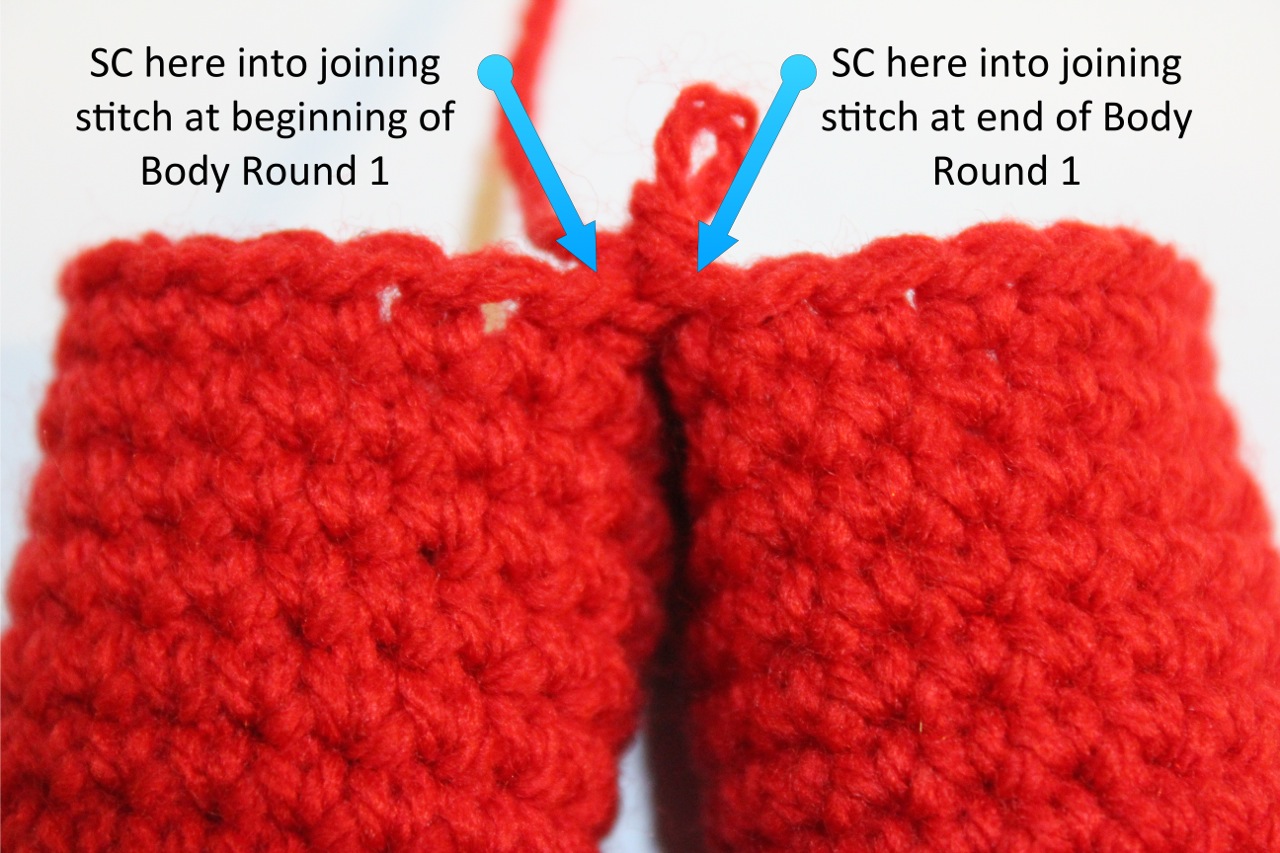
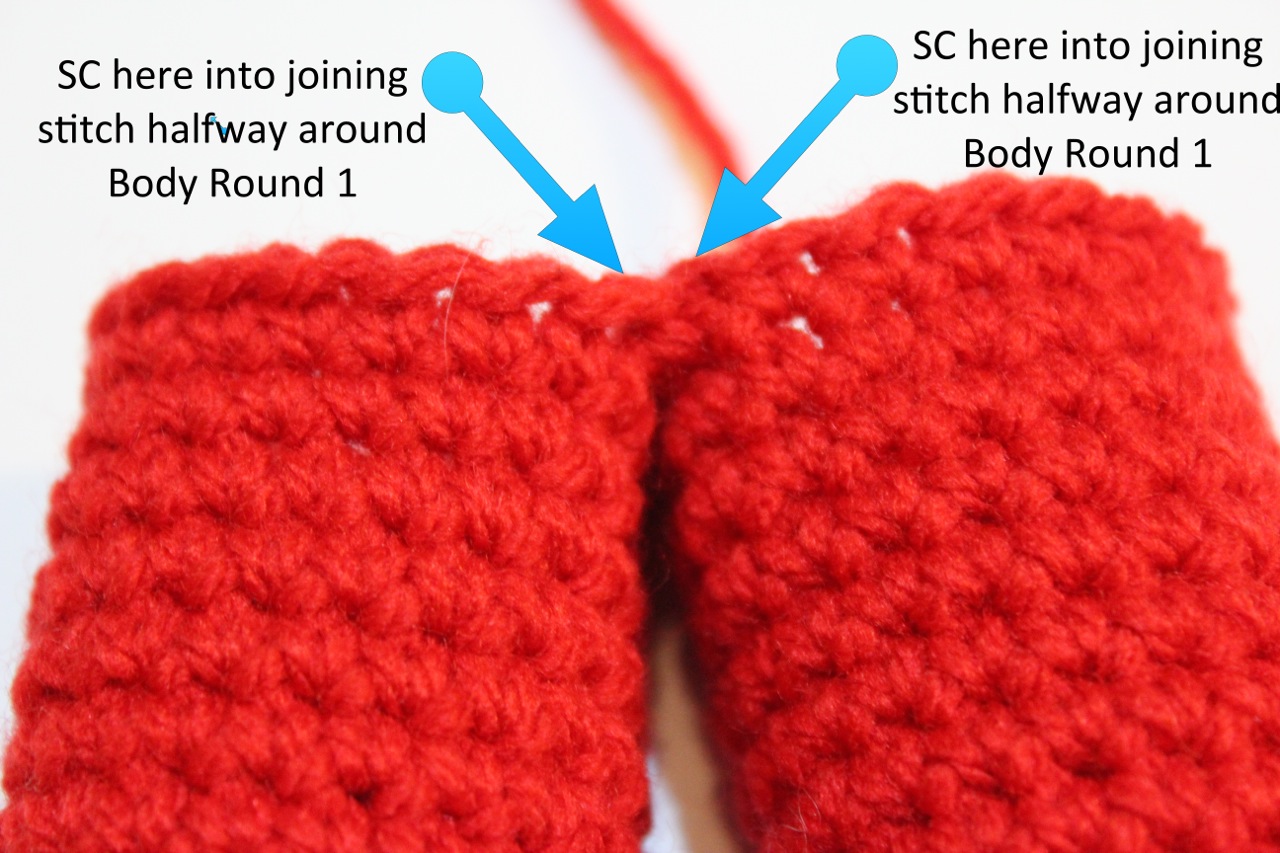
Round 1: sc2 into joining stitch (ijs), sc16, sc2 ijs, sc2 ijs, sc16, sc2 ijs (40 stitches)
Round 2 – 7: sc in every stitch.
Belted (TSI) Bear:
Change to black yarn.
Rounds 8 & 9: sc in every stitch.
Change to green yarn.
Rounds 10 – 11: sc in every stitch.
Indigenous Bear:
Round 8: sc in every stitch.
Change to black yarn.
Rounds 9 – 11 sc in every stitch.

ARMS
Make arms as for legs, except increase spiral till there are 19 stitches, instead of 20.
Work approx 16 more rounds or until arm measures approx 8cm. Finish off.
Make a second identical arm and finish off.
Attach Arms
Hold arms beside body and join as for legs.
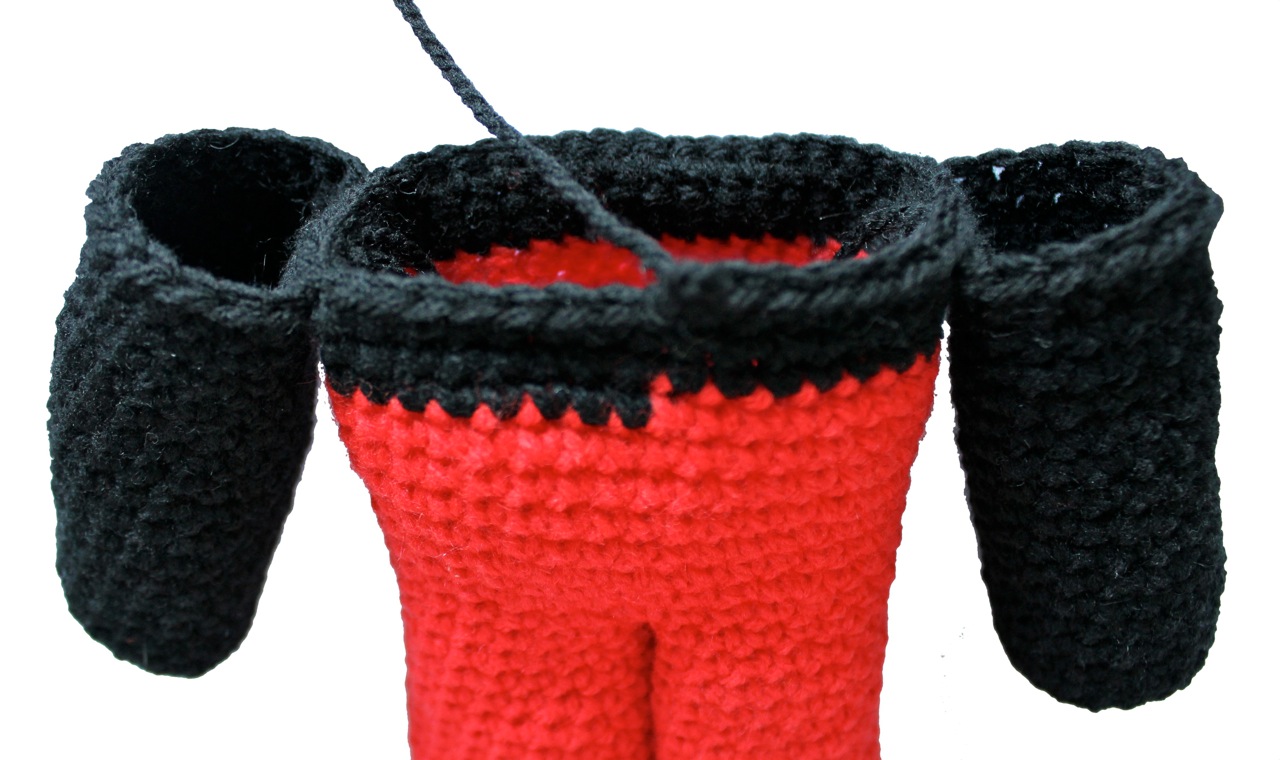
Attaching arms and Torso
Round 1: Sc 7, attach arm with 6 sc, sc 14, attach arm with 6 sc, sc 7
This should bring you back to the centre front of the bear. Note the beginning of the next 2 rounds is in the centre of the bear.
Round 2: Sc 7, sc into joining stitch (ijs), sc ijs, sc13, sc ijs, sc ijs, sc 14, sc ijs, sc ijs, sc 13, sc ijs, sc ijs, sc7, in a big oval. (62 stitches)
Round 2a: sc 7
At this point the beginning of the round changes to the left of centre.
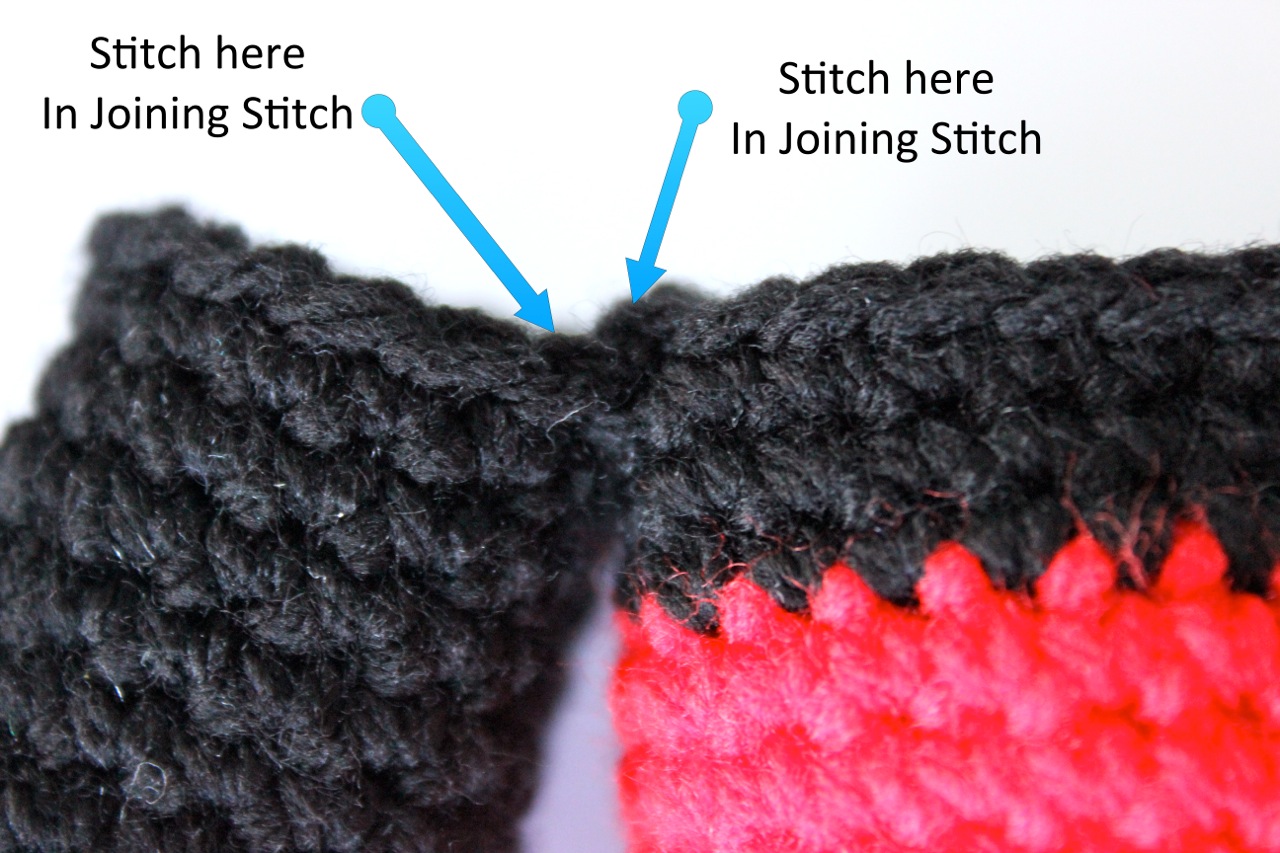
On the first round, sc into both sides of each joining stitch, as we did after we joined the legs. If we don’t do this there will be a hold where stuffing will be visible.
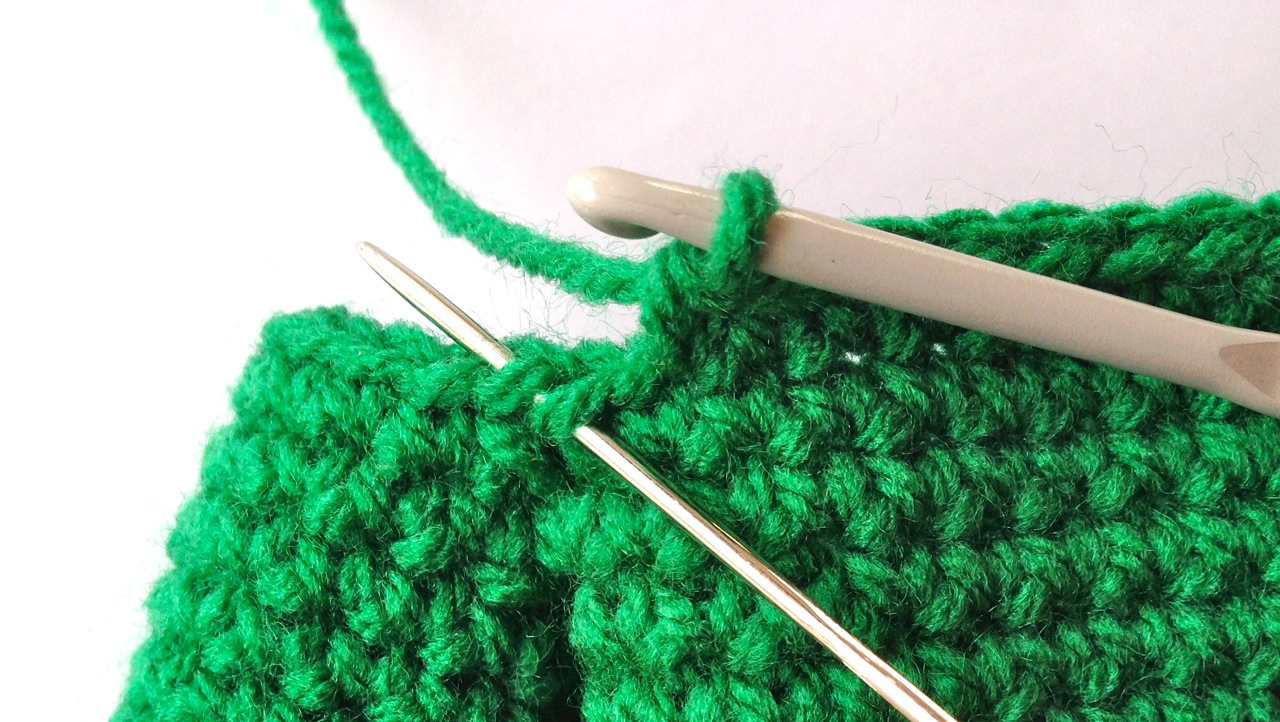
The needle shows the first decrease at the beginning of Round 3.
We will decrease every time we reach an arm/body join, on both the front and back. This will form a raglan sleeve.
Round 3: sc2tog, sc13, sc2tog, sc14, sc2tog, sc13, sc2tog, sc14 (58 stitches)
Round 4: sc2tog, sc12, sc2tog, sc13, sc2tog, sc12, sc2tog, sc13 (54 stitches)
Round 5: sc2tog, sc11, sc2tog, sc12, sc2tog, sc11, sc2tog, sc12 (50 stitches)
Round 6: sc2tog, sc10, sc2tog, sc11, sc2tog, sc10, sc2tog, sc11 (46 stitches)
Round 7: sc2tog, sc9, sc2tog, sc10, sc2tog, sc9, sc2tog, sc10 (42 stitches)
Round 8: sc2tog, sc8, sc2tog, sc9, sc2tog, sc8, sc2tog, sc9 (38 stitches)
Round 9: sc2tog, sc7, sc2tog, sc8, sc2tog, sc7, sc2tog, sc8 (34 stitches)
Round 10: sc2tog, sc6, sc2tog, sc7, sc2tog, sc6, sc2tog, sc7 (30 stitches)
Round 11: sc2tog, sc5, sc2tog, sc6, sc2tog, sc5, sc2tog, sc6 (26 stitches)
Round 12: sc9 (This part row is so the join to the head colour is towards the back of the bear.)
Now is a good time to sew the star or circle on the tummy, while you can still access the inside. See below for star and circle instructions. Sew the star or circle over the joins in colour on the tummy to hide them.
At this point the beginning of the round changes to the back of the bear.
It’s time to stuff teddy. Fill all the way to the neck quite firmly, as we still have to make the head.
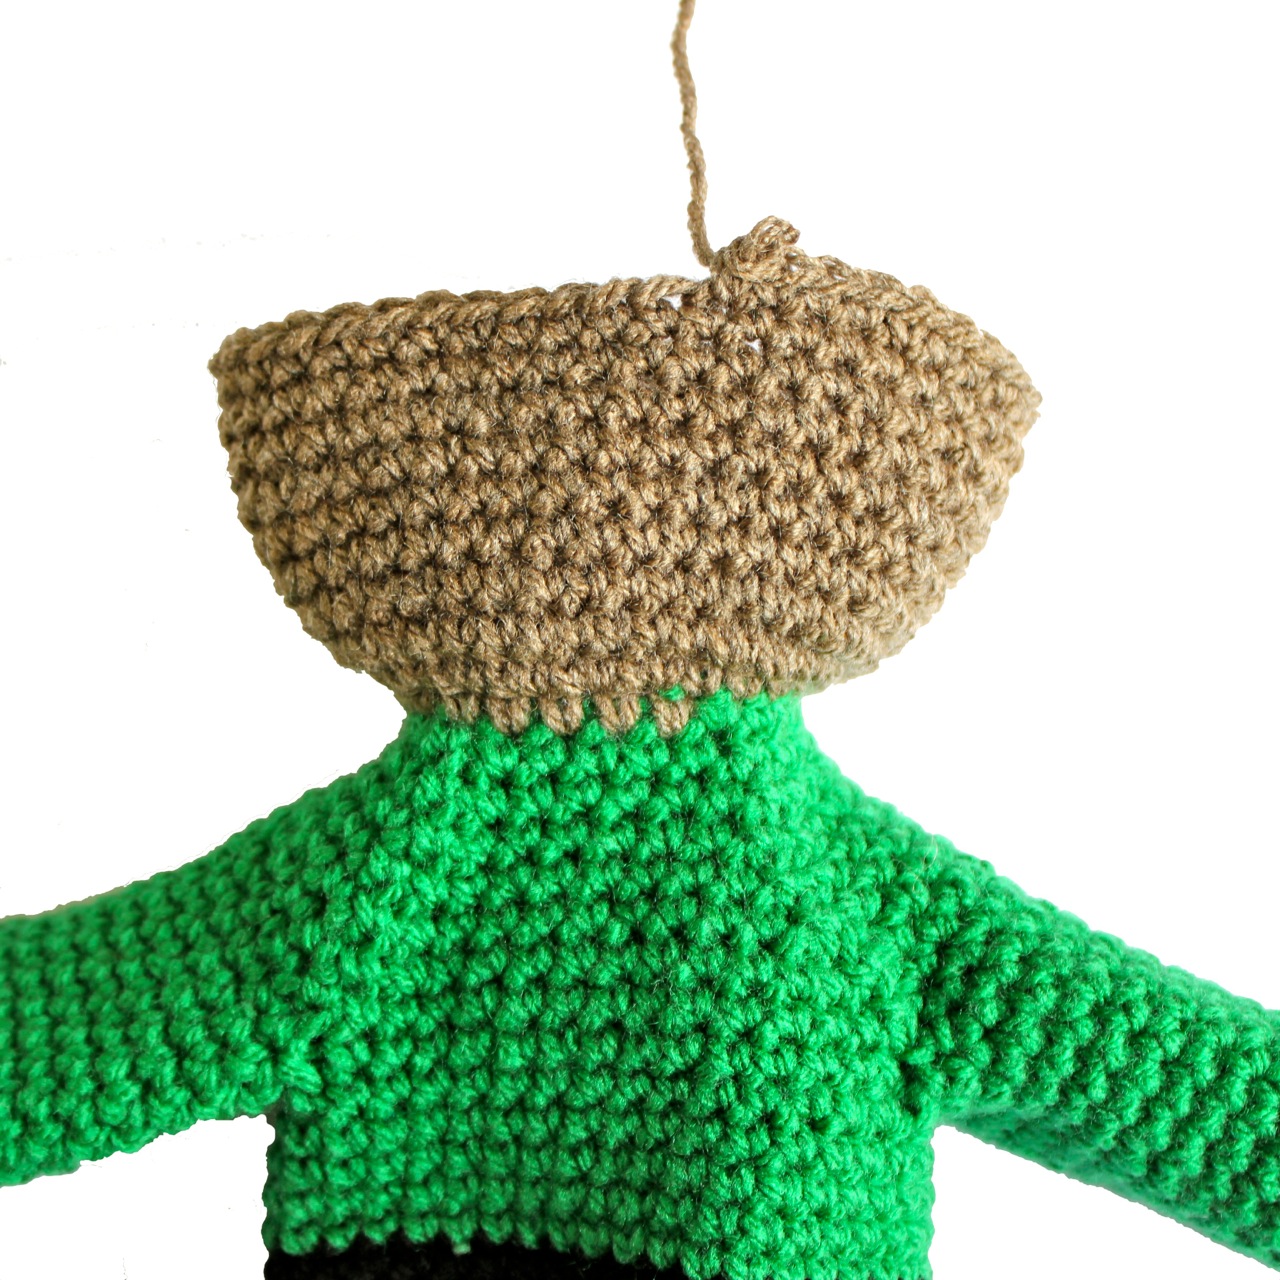
Change to head colour.
Head
Round 1: sc in each stitch (26 stitches)
Round 2: sc2 in each stitch (52 stitches)
Round 3 – 12: sc in each stitch
Round 13: *sc2tog, sc7 * x6 (46 stitches)
Round 14: *sc2tog, sc6 * x6 (40 stitches)
Try and keep these stitches tight as you decrease, to minimise holes.
From now on continue *sc2tog, sc5 * until 24 stitches remain
(24 stitches)
Now it’s time to embroider the face on.
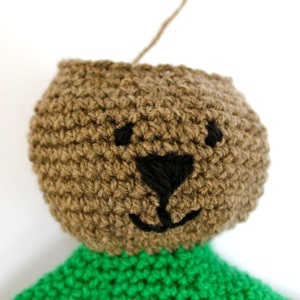 This is what my teddy’s face looks like, but feel free to make your teddy an individual.
I use black yarn, and a darning needle.
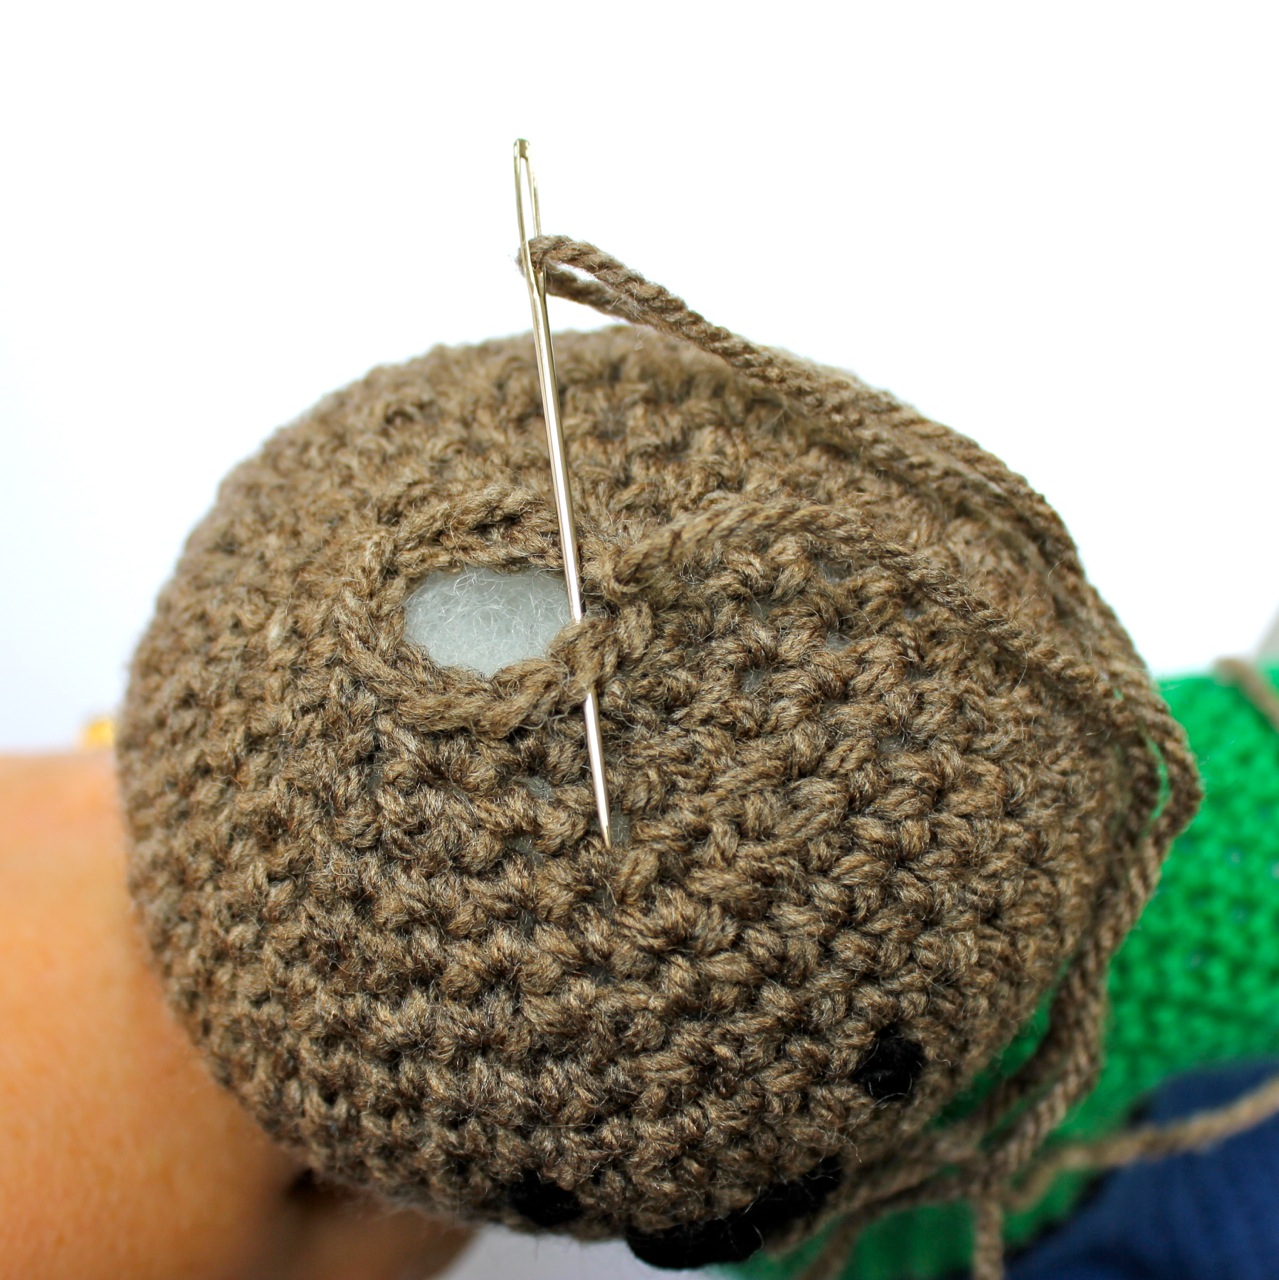
It’s time to part stuff teddy’s head.
Continue making the head.
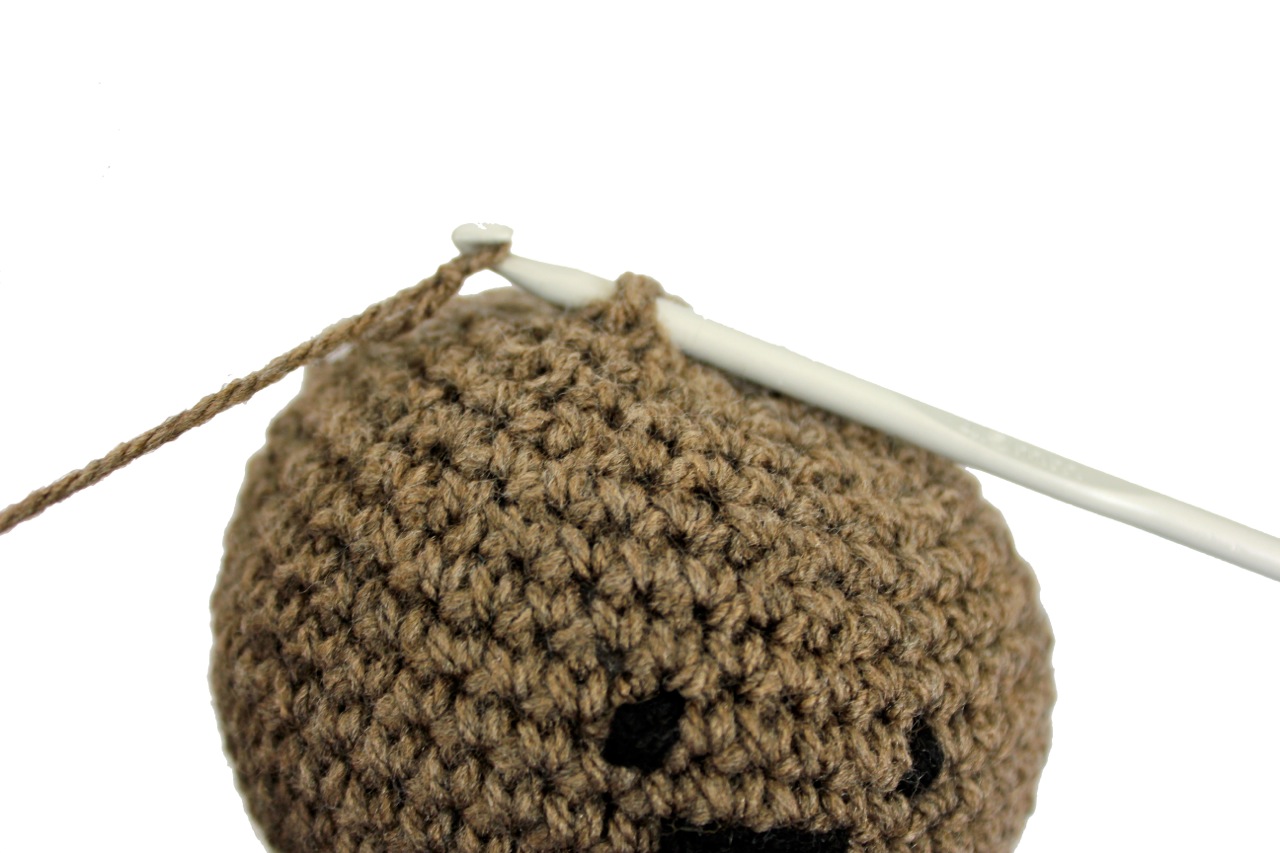
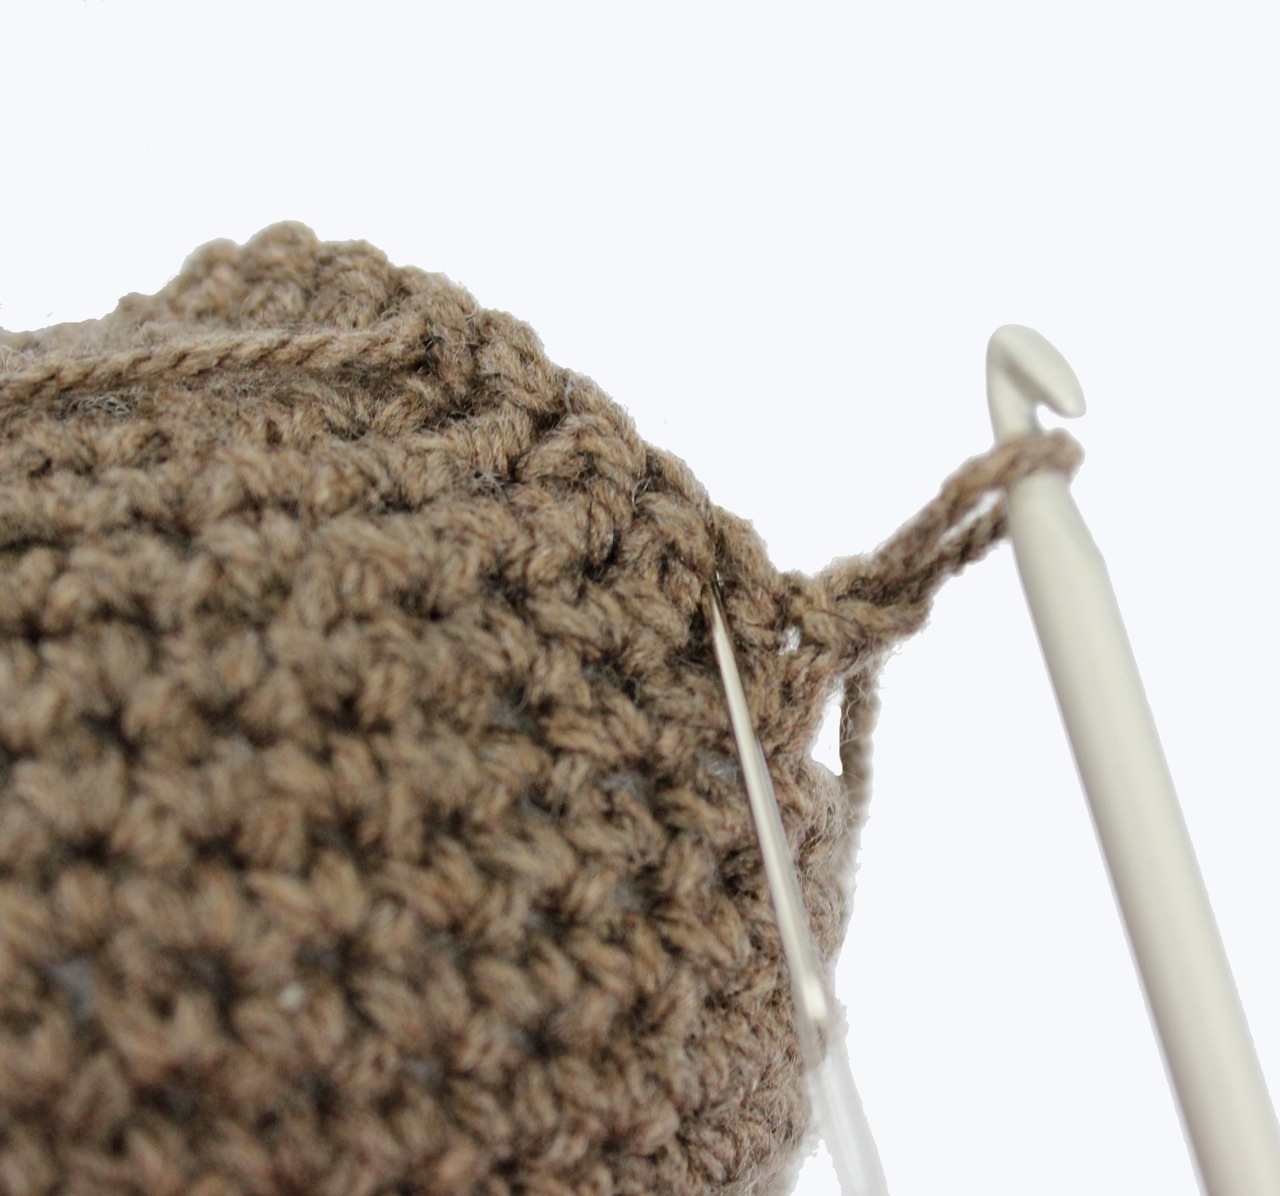
*sc2tog, Sc2 * repeat until there are 9 stitches left. Finish off.
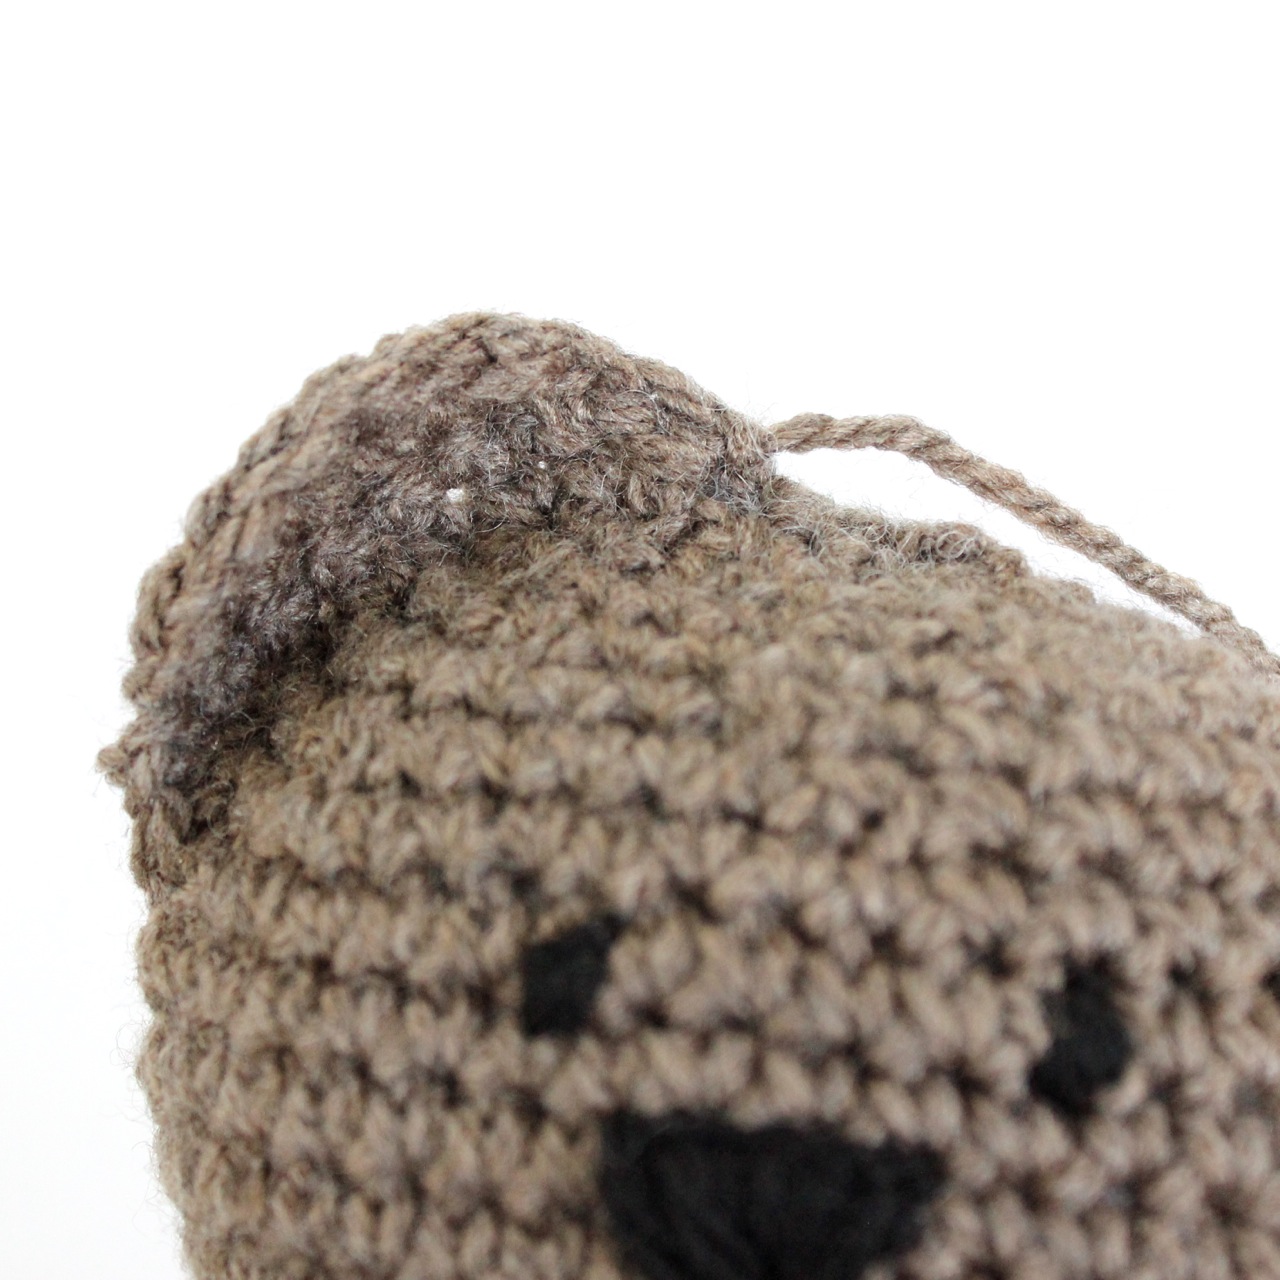
Thread a needle to sew an invisible seam across the top. If it gets a bit bumpy at the end, thread the needle into the head and pull the seam flat.

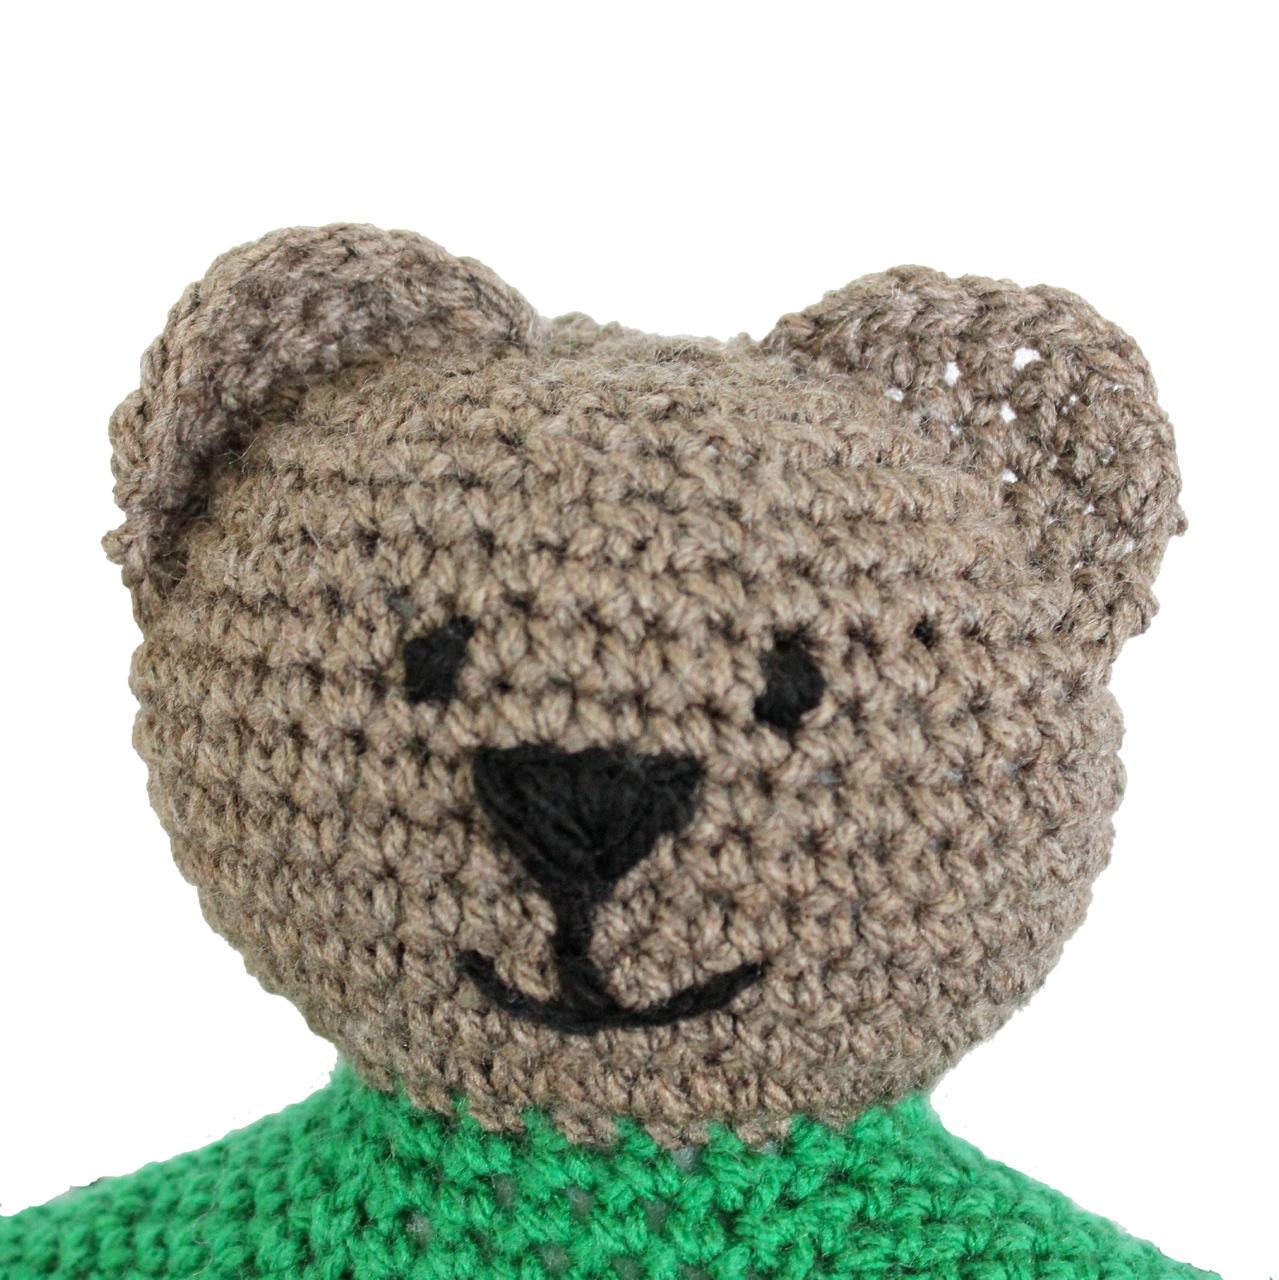
You now have a bear that looks a bit like a gingerbread man. Next we will make the ears.


Ears
Make a slip loop. Row 1: sc9, picking up stitches on the head where you want the ears. Start at the top.
Row2: ch1, skip the first stitch, sc6, slip stitch into the next stitch, turn.
Row 3: ch1, skip the first stitch, sc5, sl st into next stitch, turn.
Row 4: ch1, skip the first stitch, sc3, sl st into next stitch, slip stitch 3 more times along the edge of the ear, ending where you started.
Finish off.
Repeat for second ear.
Sew ends in.
Star
Magic circle.
Round 1: Ch3, dc2, *ch1, dc3* 4 times, pull tight circle, slip stitch into first dc to join circle together.
You have made a mini pentagon.
Star point: Ch5, sc into 2nd loop from end of chain, hdc into next loop, dc into next loop, tc into last loop. Sl st into next chain space in circle.
Repeat 4 more times to make the 5 star points. Finish off.


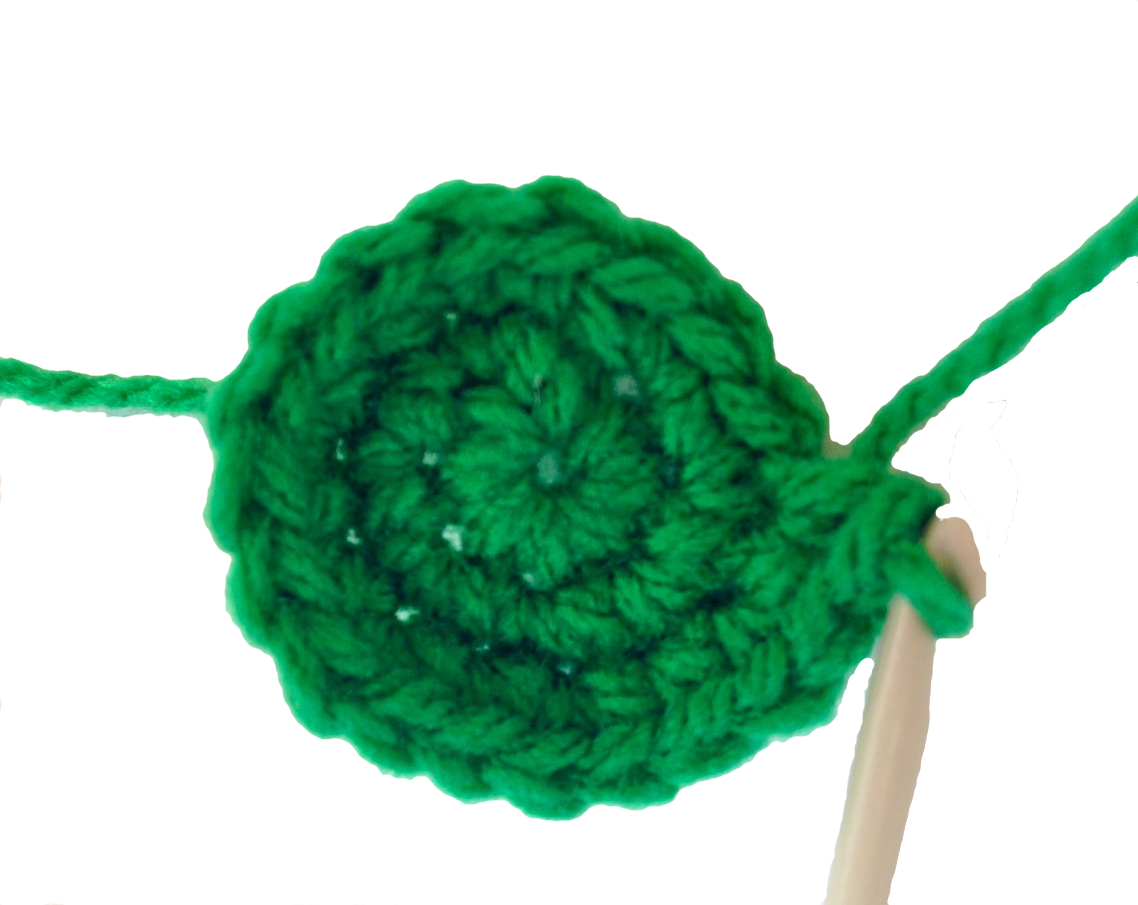
Circle
Magic circle to start.
Round 1: Ch 1, 10c into magic circle, pull magic circle tight, sl st into top of first sc.
Round 2: 2dc into each stitch, sl st into top of first dc. (20 stitches)
Round 3: 2 sc into each stitch, sl st into top of first sc. Finish off.


Magic Circle


Thank you, this is wonderful – just what I needed 🙂